 |
| When I was a little girl, my mother taught me a "nonsense song" which she had learned when she was young; it went like this: OH! - "Mares eat oats and does eat oats and little lambs eat ivy a kid'll eat ivy too, wouldn't you?" but this is what most people heard when they listened to it played on the radio - OH! "Mairsy doats and doesy doats and a little lamsy-divy a kidlle-deedivy too- wooden shoe?" as a child it took me a while to figure out what this song meant, and no doubt you're probably wondering what in the world I mean by including these silly lyrics as the intro to this post? The answer is pretty simple- I needed a working title with IVY in it, which is how I came to recall this silly song. Funny how certain tunes can stick and stay in your head no matter how old you get. ANYHOOSIE as you've probably figured out by now this particular post is all about IVY! ❧❦❧ so lets get started I don't know if anyone admires Sole's Ivy tutorial on Pequenas Cosas blog: as much as I do. It is one of the most REALISTIC on the net. I always wanted to give it a go, and since I needed some IVY for the Villa Leone window planter, I turned to her Hiedra tutorial |
http://minis-sole.blogspot.ca/2014/08/hiedra.html?m=1
I followed Sole's instructions very closely and although I'm satisfied with my results hers look Really Real!
even so
here's what I did
I used wide masking tape and laid it sticky side up.

 |
| I laid thin pieces of wire on top of it to form the stems. |

 |
| I laid a second piece of masking tape over the top and outlined the stems with a ball tool to seal the 2 layers. |

 |
| Then I drew on the leaf shapes with a pencil and cut them out with scissors. |
 |
| Afterwards, I painted the stem brown and the leaves green. I made 4 stems of varying lengths and left enough of a stem on the ends of each one so that I could hang them over the edge of the planter and arrange them to suit. Well FOUR STEMS was not quite enough because my ivy looked too skimpy for the visual bulk of the planter so I ended up using some leftover leaf scatter I had in my stash to fill in some of the gaps which is what you see below- the extra scatter really beefed them up! |
 |
| Below is how the ivy looks installed. I'm happy with the finished planter and would give Sole's tutorial 2 thumbs WAY UP! * however-make sure to make more than you think you'll need* |
 |
| and thus ends Ivy tutorial #1 ❧❦❧ next up- |
 |
| Ivy tutorial #2 which came about as a result of wanting to fill up these two china pots which I'd cobbled together from some beads. For the ivy I used a product which Fatima and I purchased on line. BIRCH SEED SCATTER if you have birch trees in your neighborhood- keep the cones then make your own! http://www.zaboobadidoo.com/making-convincing-ivy/ The 2 blogs above and below are both good references on how to use it for ivy http://www.reapermini.com/Thecraft/24 here's what I did  |
 |

 |
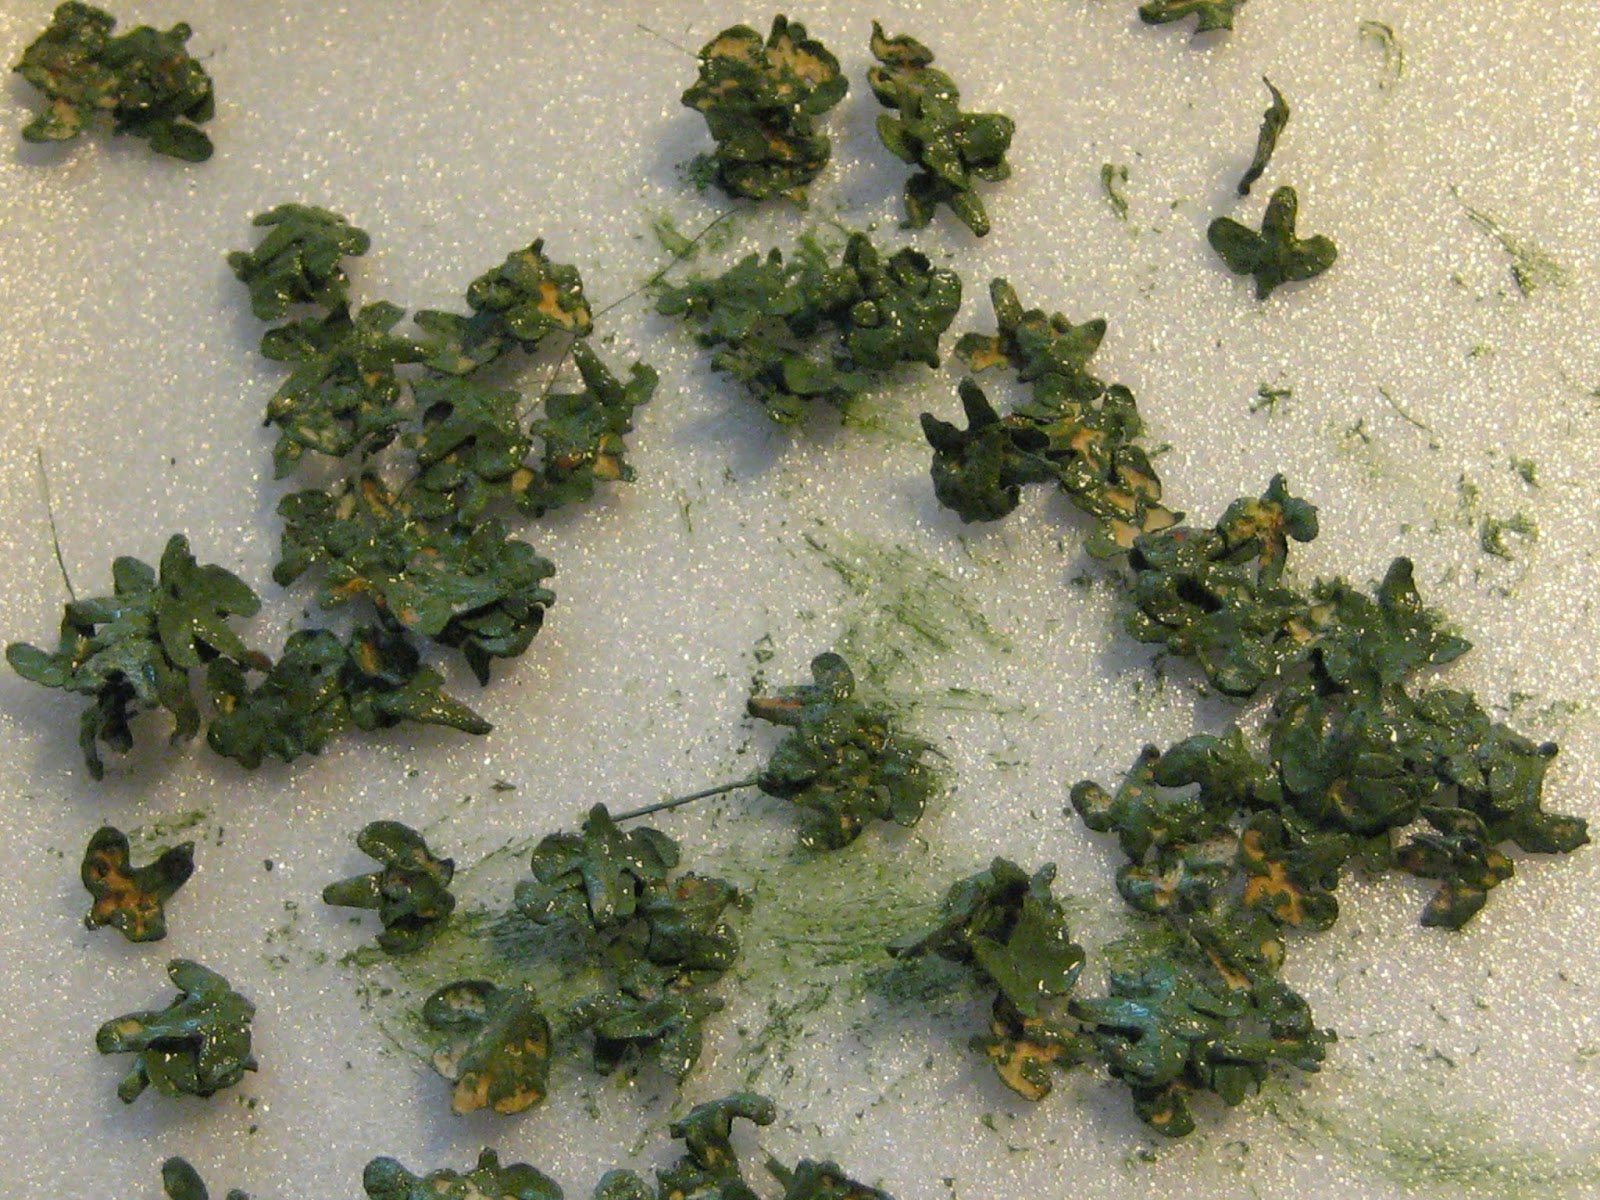
| I mixed two greens onto the birch spacers, and mixed them in with a paint brush, dragging it over the spacers so that they were evenly covered. |

 |
| It takes a while for all of the individual leaves to get painted and even when you think that they're done, many leaves will be still missing some paint, however you can always touch up the bald spots later. When they were ready, I transferred them onto a non-stick surface and separated any clumps with my fingers. This is messy and also takes a while because the leaves are very tiny. |
 |
| I made several batches of ivy leaves in different shades of green; not wishing to run out of them too soon. |
 |
I re-touched the leaves with more paint as required and adjusted the stems to form a shape and draped it to my specifications.
 |

 |
| and Ta Da! ❧❦❧ Ivy tutorial #3 is a variation of the same as above ( in case you don't happen to have any dead roots waiting around in your stash-) I'm using loops of thin wire which are tied off about 1/4 inch from the end |


 |
| cut through the loops and splay outward so you can paint them. |

 |
| When painted brown, leave them to dry. I propped mine up with a clothes peg |

 |
| I shoved a little air dry clay ( Play-doh) into the pot and then added the painted stems, shaping them as needed. |
 |
| This photo reminds me of the legs of an emerging spider- ugg! |
 |
| I used 527 glue because it stays fluid long enough for you to dip the ends of the ivy leaves into it then stick them to the frame. |


 |
| When I'd applied enough of the leaves, I re-adjusted the stems and then touched-up the stems with more brown stain, and the leaves with more green acrylic paint mixed with a green glaze. |
 |
| And placed the vases on the mantle in Villa Leone's Morning Room. |
 |
| and this is what they look like in place! And although we have come to "The End" I can't let you go until I give you the link to the tune of that nonsense song so that you can have it stuck in your mind from now on too-
https://www.youtube.com/watch?v=EU2CKQQr90E
OH! mairsy doats and doesy doats and little lamsy-divy A kidlley-divy too, wooden-shoe? OH a kidlle-divy too, wooden-shoe." ❧❦❧ miss you mom ✝ elizabeth |
.jpg)

