 |
I hope I'm not repeating myself too much with the following photos, but brace yourself to see MORE STAIRS!
It just can't be helped. With this WILLOWCREST kit, the corner staircase HAS to be completed first because otherwise there is no way for me to get my giant hand inside to do the necessary work.
As you already know, every doll's house comes with its own special needs and surprise surprise;
Villa Leone has quite a few! :/
|
 |
| This is where I left off in my last post. The stairs were built but before I could install them I had to finish the window wall, which meant everything had to come out, walls, floors, stairs, windows, etc. My project was to build that running panel that follows the stairs along the wall. I'm sure it has a proper name but I don't know it. I measured the area I was going to be working on and cut some poster board to the size I wanted then cut it into shape to follow the stairs and glued it firmly into place. I sealed the surface with MOD PODGE and let it dry. I remembered that I had purchased these embossed border stickers from Michael's Craft Store, and chose the pattern I wanted for the wall. |

 |
| The stickers are an embossed plastic so the pattern would stand up to the wet wall patch I was going to apply over it. |
 |
| This is the panel with the dry wall patch applied, the border trim, then some wood trim. I sprayed it with several layers of hair spray, and then hauled out the paints. |
 |
| I gave the panel a coat of Vintage White acrylic paint. Whilst the paint was still wet I mixed dabs of Black Gel Stain and an oil based wood stain. |
 |

 |
| A close up of the wall texture. |
 |
| So this is how the stone was beginning to look |


 |
| between applications of the mix, I would give it a blast from the heat gun which sped up the drying process considerably! |
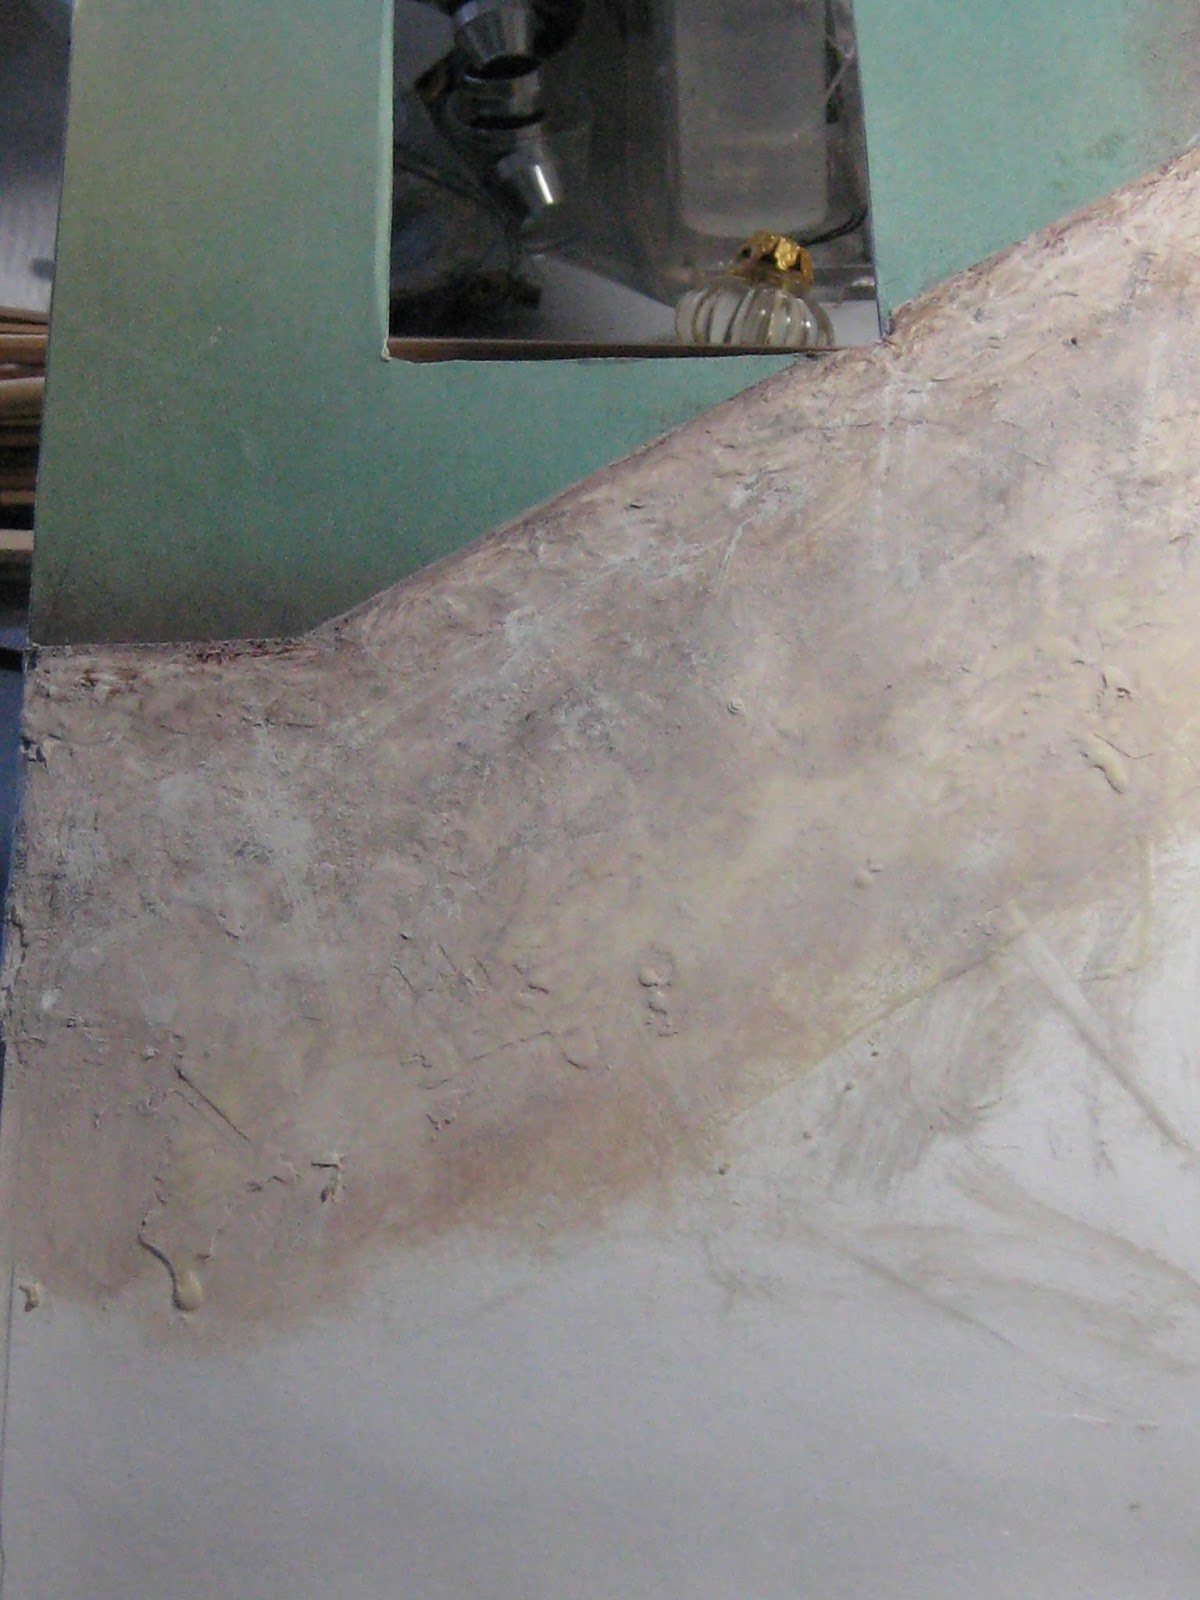 |
| After I was satisfied with the color, I took my wall outside and sprayed it with a Clear Mat Acrylic Sealer , which gave the surface some shine and made it appear more like a polished stone. When it was dry I brought it in for additional layers of touch-ups then mattified it down with more hair spray. |
 |
| Periodically, I would check it against the stairs to see if the color mix was working with the color of the stone I had already done. At this stage, I needed to pause and figure out how I was going to finish the interior window |
 |
| Finding a solution was going to look awkward no matter what I did. The window fame in photo above, is actually the exterior frame, but it gave me an idea of how much of an intrusion into the very narrow stairwell, I could afford. NOT MUCH!!! |

 |
| WELL, after much fiddling and fussing around I finally found a way to make the window fit, and NOT protrude too far out from the wall. Making the needed adjustments for the inside of the Villa, means some additional work on the exterior of the hall wall, but I'll have to tackle that problem LATER! |
 |
 |
| I made sure that everything blended with the mural. |
 |
| then decide to add some trim at the base of the stairs too. When reviewing this photo I didn't like the way the vertical piece of trim butted into the wood, so I"ll need to make some additional corrections there too. |
 |
| More painted trim in the corner, however I 'll have to wait until I permanently install the hall wall before I can finish the trim right up to the ceiling- a tricky job which I already expect will make me sweat! :(( |
 |
| So there it is! I think I'm kinda done for the time being. *** Now it is time to play! or is it????? |
 |
It was as I was taking photos that I realized that the stairsteps were very pale. hmmmm, a very strange looking flight of stairs "but hey, that's how I roll" *sigh* |
 |
| Anyway... above is the BEFORE- |
 |
| and this is AFTER. Once I had aged the steps I felt I needed to age the wall as well. I added more plaster to places on the wall, as well as chalks, and tea stains, and lead pencil to look like fine cracks. |

 |
 |
| Hey, maybe I need a light? So I installed that as well. It had to be high enough to clear the head and yet low enough for the homeowner to change the bulb. Then I needed more aging on the lower corner of the wall. |


 |
| I also carved back some of the steps so the treads weren't as deep and therefore, less treacherous. |
 |
| Okay, that's better! |
 |
| and just when I thought I was DONE, I decided to revisit the window once again and make that look older too. |
 |
| After I redid the window, I applied a thin, light layer of drywall patch over the entire surface of the wall using my fingers to work it gently over the paper which I sealed with very light applications of hairspray. This process muted the sea-green color without changing it overmuch which means that I am going to have to repeat this technique on all of the other wall paper panels in the halls to make them look cohesive. |
 |
| A close up of the aged wood window frame. |
 |
| This photo shows what the entry hall should look like once it is permanently installed. The wall-light fixture will be in the stair well and only the lower portion of the hall will ever be seen. |
 |
Now this was originally going to be THE END of this post- however, after visiting some of the other blogs on my reading list and seeing how they are excitedly getting their doll's houses decorated for Christmas, I figured that perhaps I should as well. to date it hasn't felt very Christmasy around here, but last week we had a HUGE snowfall here in western Canada and even though a lot of it has already melted away, when I look out of my Studio window this is some of what I see. |
I don't know what else will!?
 |
below is my own mini contribution. Later tonight I will FINALLY put up my Real life Christmas tree that is- (if I'm not too tired) |
 |
| My personal tribute to "The Ghost of Christmas Present" |
 |
| The box of Laduree macaroons was made by Fats, the bag was a gift from Magda at "17-17"blogspot., and the vintage celluloid Santa came from parts unknown. |
 |
| the peppermints were a gift from my friend Bettie Smith, the wrapped gifts came from wine glass markers that I found at the thrift store. The canning I made from beads and bits. In real life I don't Can, but my friends do, so I thought that they would appreciate some home-made preserves for Christmas. |
 |
| Under the table is a gift to my daughter; Grandma's favorite stew pot, filled with some hand-carved kitchen utensils, honey from the hive at "Green Dolphin Street", a bottle of Italian extra virgin olive oil and a candy cane (although I know she doesn't really care for them; but I Do!♥ ) |
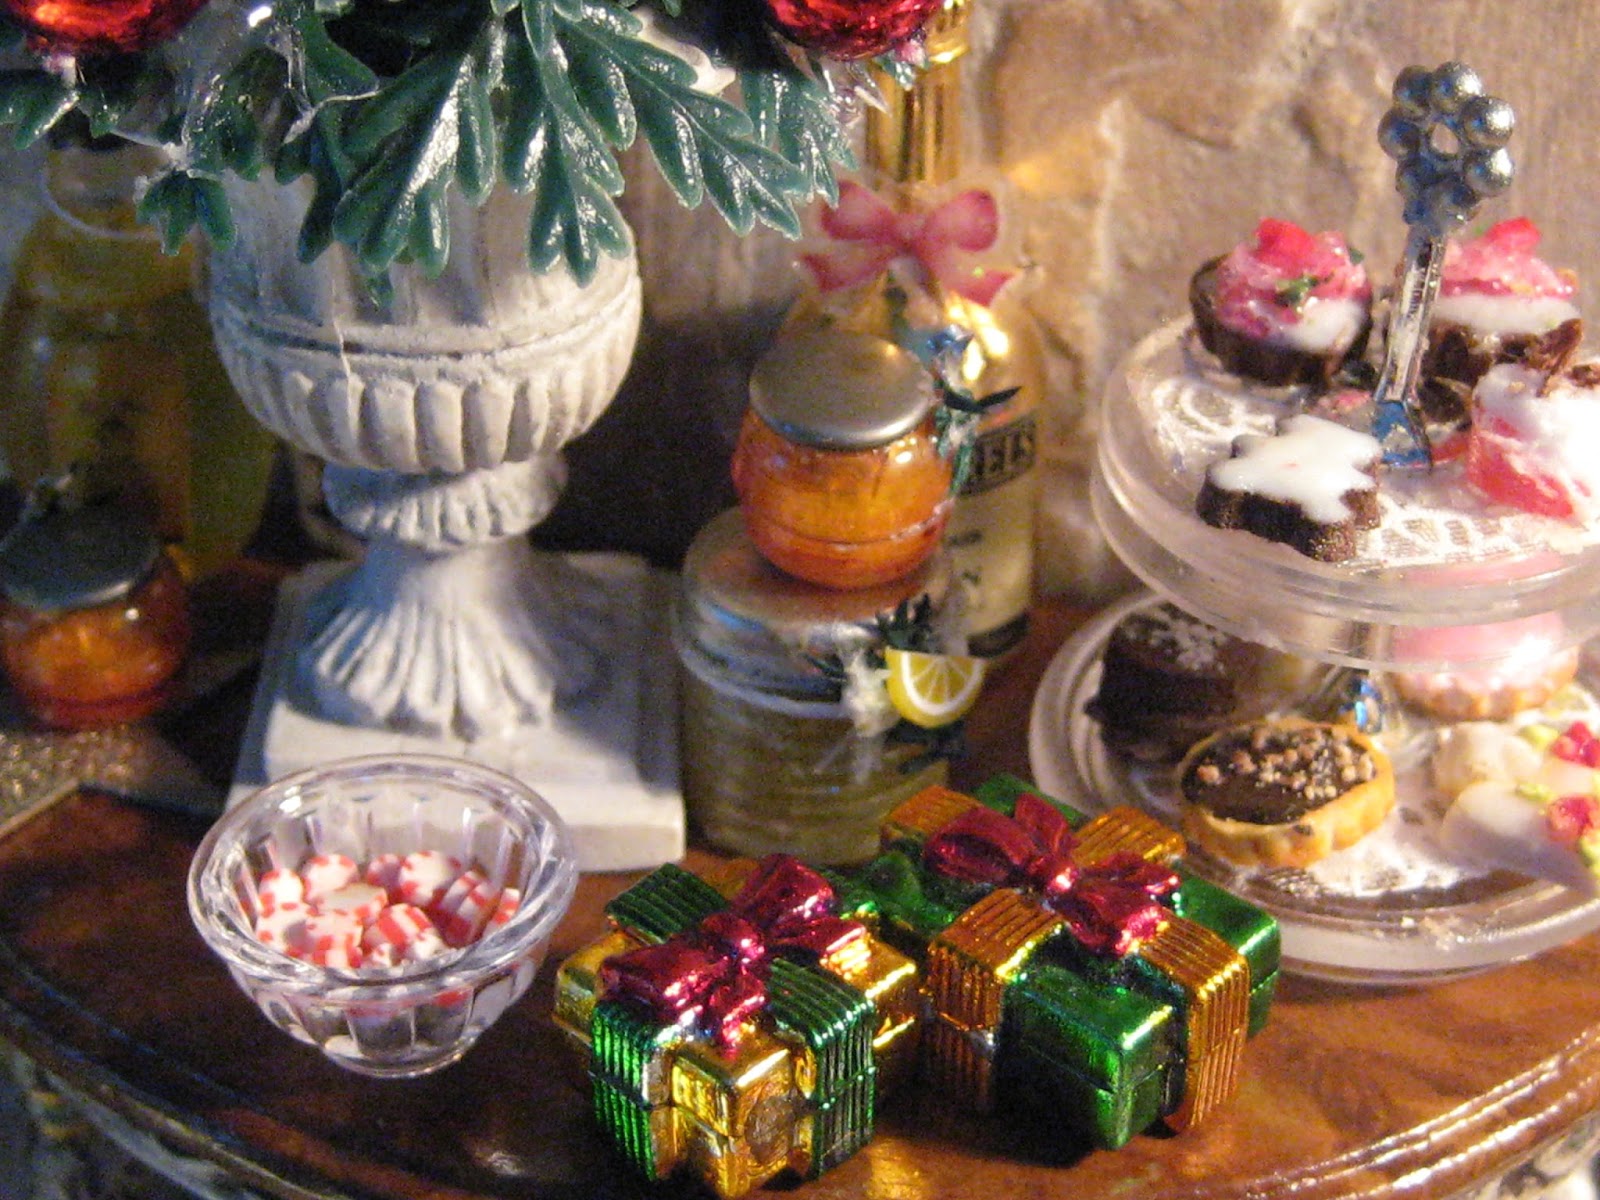 |
| I thought it might be a good idea to offer any visitors some holiday baking, which it appears they've been helping themselves to, so I think it must taste pretty good! :D |
 |
 |
| More preserves, some specialty oil and a bottle of Peppermint Schnapps |

we have at last arrived at the SECOND ENDING of this post.
I will be leaving you here but know that I shall be back in the New Year with HOPEFULLY something more than MORE stairs, to share with you.
until then-
HAVE A VERY MERRY CHRISTMAS!
A SHOUT OUT to all of my wonderful followers, both Old and New- I Thank You! ♥
I wish you all
A HAPPY, as well as a HEALTY
NEW YEAR!
https://www.youtube.com/watch?v=iO7ySn-Swwc
"For unto us a Child is born, unto us a Son is given and the government shall be upon HIS shoulder and HIS NAME shall be called; WONDERFUL, COUNSELOR, THE MIGHTY GOD, THE EVERLASTING FATHER, THE PRINCE OF PEACE"
elizabeth
.jpg)

