*******
When my sister Catherine's daughter, Amber, was just a small child, she use to come running into my sister's bedroom, first thing every morning, jump into her mother's bed and sing,
"It's a great new day mommy,... Hal yay you ya!"
Today, I also am singing "Hallelujah!"
This bedroom of #43 Green Dolphin Street is pretty much Done, Finished, Over!
After just staring at it for nearly a month, I finally got the old mojo up and moving again and plowed through it to nearly the finished line and so Here it is finally ...... 'Hal yay you ya!'
This bedroom of #43 Green Dolphin Street is pretty much Done, Finished, Over!
After just staring at it for nearly a month, I finally got the old mojo up and moving again and plowed through it to nearly the finished line and so Here it is finally ...... 'Hal yay you ya!'
 |
| Rise and Shine! |
 |
| The sun is up and streaming through the bedroom window and falls first on the contents on the top of the hand- painted chest of drawers *** This chest of drawers is dressed with assorted perfume bottles, photos and lighting. All of the perfume bottles are made by me from my collection of baubles and beads . They are displayed on half of a silver locket which I found at the thrift store, and which made a perfect vanity tray. I also made the picture frames and the pocket watch on a fine chain from jewelry findings and various odds and sods . There is a chinese mud figurine that is a reference to the novel Green Dolphin St. when William, the hero, is shanghaied in China. The tilting mirror was a gift from a friend and the globe lamp is by Ni-Glo. In this cottage, the vintage lighting is 'upgraded' to electric so that I can use a great variety of styles and mix it all up as desired. |
 |
| This little chest of drawers is by author unknown, but it is such a pretty piece of furniture! It is hand-painted on both sides as well as the top and on the 4 drawer fronts, which all open but are not yet filled. On the left you can see a brown leather bound journal that Janine of MINWORKS made for me. It has a metal clasp and two tiny letters tucked inside that peek out from the top . ( Perhaps, Love letters that William might have written to Margarite, the sister in the novel that William had loved and meant to marry, but didn't. ) |
 |
| The left side of the bedroom To the left of the dresser is the bed. I added some cotton fringe to the edge of the bedspread, new since my last posting, and I like the effect. The picture is in the same position as before but now there are wood beams framing the walls. The beams are made from the cedar flooring that is included as part of the Greenleaf doll house kits; horrible for floors but great for rough ceiling beams! I glazed over the wall paper and muddied it up a Lot! You can see the streaks of the glaze that should have been better applied than it was, but no matter..... The subtle pattern is now a whole lot harder to distinguish, and that is Good, because the fireplace wall was different paper pattern and now it blends in better, and the difference won't now be so obvious. ( hallelujah) I like the look of the walls to be rather 'old' looking, although I feel I was a little over generous with the glaze in some spots! sigh.... too much of a good thing, this time, but it does add more atmosphere. |
 |
| Fresh laundry Ah, I see that the laundry has just been brought up and is on the bed waiting to be put away. I wonder where, because there is no cupboard in this room; But anyway, doesn't it look pretty? |
 |
| An overview of the left side of the bedroom and bed. |
 |
| Folded Bed linen and on top; some fresh ladies handkerchiefs |
 |
 |
| And on the carpet, a leather satchel that I purchased many years ago at the Seattle Show. It has a couple of straps with tiny buckles and stitched handles, very Victorian looking. The area rug is photocopied from a magazine and then onto fusible cotton copy-paper purchased from Wal-Mart. I then glued the copy paper onto thin wool felt to give it some body. The package instructions suggest that you iron it onto your project, but I found that some of the color faded out when I did it before and so I by-passed that step and just cut out the print, spray glued the back and adhered it to the felt and then cut the carpet shape from the felt. I touched up any white edges and then installed into the bedroom. This is not the carpet I had originally planned to use but I ended up choosing it because of the bold floral pattern that picked up the more delicate painted design on the chest of drawers. Blues and terra cotta, russet and browns, are a running theme in both the Parlor and the Bedroom. The colors in the rug are big, bold and strong enough to downplay the pattern in the vintage linoleum that is on the floor. Mixing these two patterns, one on top of the other, is not always easy and yet to me I like the unique strangeness of this combination. |
 |
| A closer look at the bag and the rug |
 |
| And tucked under the bed, is an old suitcase a long ago purchase, that is used for extra storage in this room. When planning this space, it came down to whether I desired a fireplace or a closet for clothes in this bedroom and I opted for the fireplace, so the overflow of any extra clothes has to be stored under the bed. |
 |
| Looking towards the right side of the room you can see the second half of a folding screen, that I made ( the other half is downstairs in the Parlor). It was made using a magazine photo and pasting it onto mat board and then cutting into panels and sealing with paint and glaze. It carries the terra cotta color that is initially introduced on the walls and also in the area rug and in the pattern on the curtains. The screen serves no other purpose than to fill a corner. Some storage boxes are right in front of it on the floor. The boxes contain the toiletries and other necessities that are not able to be stored elsewhere in this cupboard-less cottage |
 |
| the ceiling fixture Above the curtained window hangs a milk glass chandelier. This is a standard commercial fixture that use to have a plain white shade. I customized it with a very thin layer of Pink Gallery Glass Paint, followed with a touch of Amber glass paint. It gives a softer glow when lit. Right behind the hanging lamp is an oval framed vintage picture of a still life with fruit. No doubt more kitchen/ dining room appropriate but I like it here anyway. Sometimes, things don't necessarily seem logical but are 'quirky bits' that make the space seem more personal and real. I have many art pieces in my own home that I mix in with the unexpected and they work beautifully together. Personally, I like things to compliment and to harmonize, but to Not Match if possible, and Other than the bed comforter and the curtains, nothing else in this room is a perfect match. |
 |
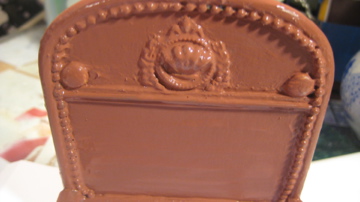
| The fireplace wall. This wall is not yet entirely finished and later I will show you what is left to do , but as you can see, it is upright and the lights are on and the mirror is anchored and I've added a medallion above the mirror and painted it out to look like a carving in the wood panel. In reality it is a gold plastic button backing that had an interesting cut-work pattern and a flat back. It eats up some of that dead zone between the mirror and the ceiling without being too obvious; there but not there. |
 |
| and on the mantle, I've opted to keep the mantle rather sparse, unlike the mantle in the Parlor which is fully loaded. This display features a pierced porcelain plate that I purchased at the West Coast Miniature Show this past June. I found the plate stand in my junk box only just recently. The bronze French calvary officer is a RISK gaming piece. This was an older edition that had French Napoleonic soldiers, canon calvary and infantry in boxes of colored plastic armies that you tried to 'conquer the world' with. I bought the game for my son's Christmas Present, many years ago. When he got tired of 'thrashing his foes' he put the game away. I would secretly raid the game pieces and steal a soldier from each color. Later, I would paint and age them with different finishes. Fortunately, My son never missed these casualties of war, and now the company who makes the game RISK, uses only generic blocks for colored armies rather than these little figurines. Boy, was I thinking ahead or What!!??? ( heeheehee ) yes I know... My Bad |
 |
| Detail of the front of the fireplace and the mantle and mirror |
 |
| These bronze baby shoes and the double baby photograph is from FATS. Isn't it wonderful? She's such a clever lady! |
 |
| An overview of the fireplace wall. I have a William Clinger Windsor chair, stationed to the right of the fireplace, with a slouchy toile cushion on it, which at least gives the lady of the house a place to sit and read comfortably, sip a cup of coffee or tea and/or put on her shoes. Visually, it balances the visual 'weight' to the right of the fireplace. |
 |
| A closer look at the focal point of the bedroom and the 3 storage boxes in the corner, on the floor. |
 |
| the coal fire I made a coal fire for the fireplace and discovered that if you use Gallery Glass 'Lead' Paint, it gives a very dense and realistic looking charcoal briquette. I let it dry a bit and then squeezed on a tiny bit of gel school glue and then topped it with some Real Life ashes from my Real Life fireplace and let it fall onto the hearth as well |
 |
| Real Ashes! |
 |
| A nice warm fire to curl up next to |
 |
| The sun is still up so let's do a quick review *** The view with the lights off and the sun light streaming through the curtained window. I like this photo. It looks like it could be a garret room in a tall walk-up apartment somewhere in Paris. |
 |
| View from the top |
|
| With the lights on |
 |
| and My very favorite shot with the lights off and only the sun shining in. I Love this picture! |
 |
| So this is the end and this is my Vintage Victorian Bedroom, as it stands right now. It is finished ..... well almost . All it needs now is a DOOR! (to the loo) *** |
 |
| my door To be continued ......... "Hal yay you ya!" elizabeth |


.jpg)

